
Imagine the comforting aroma of homemade apple cider wafting through your home, filling every corner with hints of warmth and sweetness. Each sip of this delightful beverage wraps you in a cozy embrace, making it an inviting treat for chilly evenings.
Making your own apple cider is not only simple but also incredibly satisfying. With just a few fresh ingredients and a bit of simmering time, you’ll create a delicious drink that brings everyone together and warms the heart.
Quick Overview
Homemade apple cider is a warm, spiced drink crafted from a mix of sweet and tart apples, with optional citrus notes from orange. This comforting beverage is perfect for chilly fall days or cozy gatherings, delivering a delightful balance of flavors that evoke the essence of autumn. Enjoy it warm for the ultimate experience!
Now that you have a quick overview, let’s dive into the detailed recipe steps to create this delicious homemade apple cider.
Why This Recipe Works
- This homemade apple cider recipe strikes the perfect balance between sweetness and spice, creating a comforting beverage.
- The technique of simmering allows the flavors to meld beautifully, resulting in a rich, aromatic drink.
- Its reliability lies in using a mix of apple varieties, ensuring a complex flavor profile every time.
- Enjoying this cider warm elevates the experience, making it a beloved seasonal staple.
Now that you’ve learned about why this recipe works so well, let’s dive into the step-by-step process for making your homemade apple cider.
Essential Ingredients
To create the perfect homemade apple cider, gather these key ingredients for a delightful and flavorful experience.
- 10 medium apples: Choose a mix of sweet varieties like Fuji and tart ones like Granny Smith for balanced flavor.
- 1 medium orange: Slicing this optional ingredient adds a refreshing citrus note to your cider.
- 1 cup water: This helps extract juice from the apples during cooking, ensuring a rich cider.
- 2 sticks cinnamon: These will infuse warm spice flavors throughout the cider as it simmers.
- 1 teaspoon whole cloves: Perfect for adding depth and warmth to the final taste of the cider.
- 1 teaspoon allspice berries: Provides a hint of nutmeg-like flavor that complements the sweetness of the apples.
- 1 cup brown sugar: Adjust this ingredient to taste for sweetness, balancing with your apple selection.
The full ingredients list, including measurements, is provided in the recipe card directly below.
How to Make Homemade Apple Cider
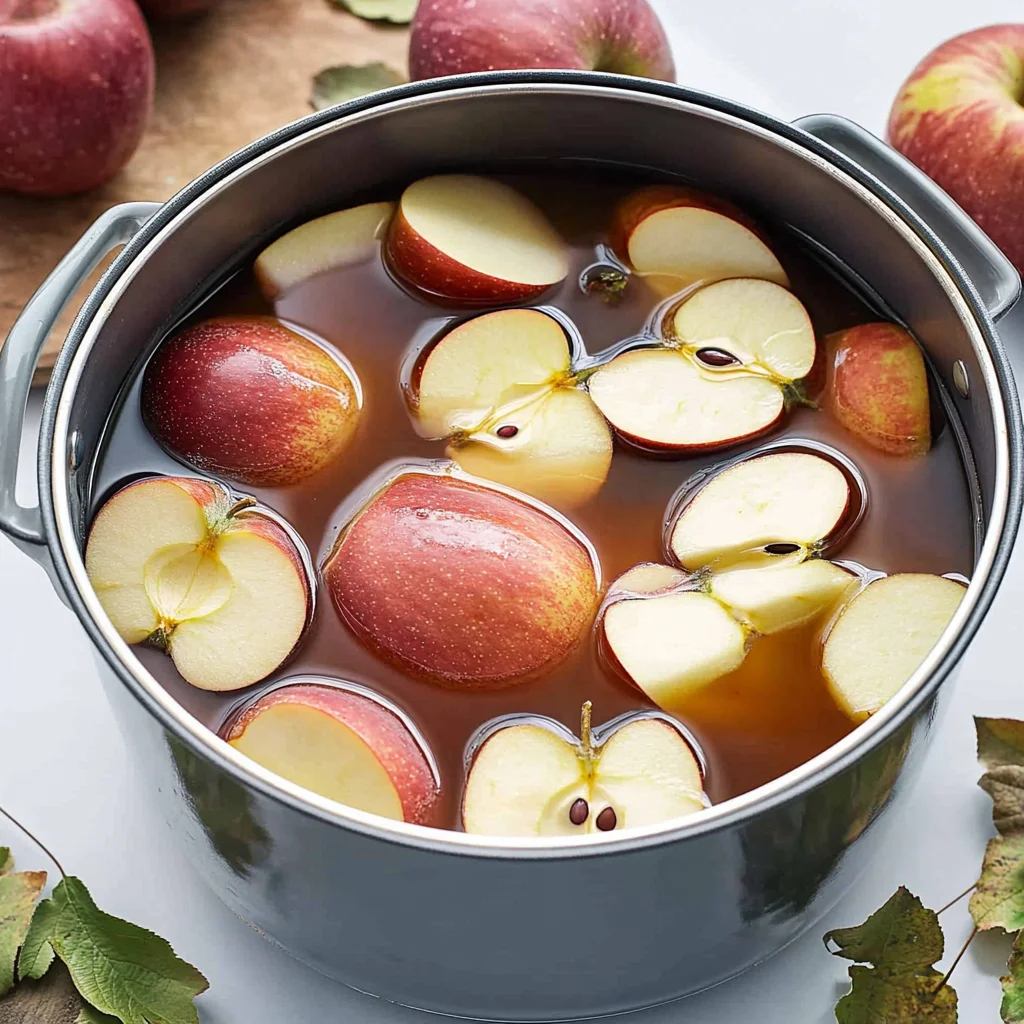
Prepare the Apples:Wash the apples thoroughly under running water, removing any dirt or pesticides. Core and quarter the apples without peeling; their skins will enhance the flavor and nutrients.
Combine Ingredients:In a large pot, combine the quartered apples, sliced orange, and 1 cup of water. Add the spices—cinnamon sticks, whole cloves, allspice berries—and brown sugar, stirring gently to blend the ingredients.
Simmer the Cider:Cover the pot and bring the mixture to a boil over medium-high heat. Once boiling, reduce to low and let it simmer for about 2 hours, filling your kitchen with a warm, inviting aroma.
Strain the Cider:After simmering for 2 hours, remove from heat. Using a strainer or cheesecloth, strain the mixture into a large bowl or pitcher, pressing down on solids to extract as much liquid as possible.
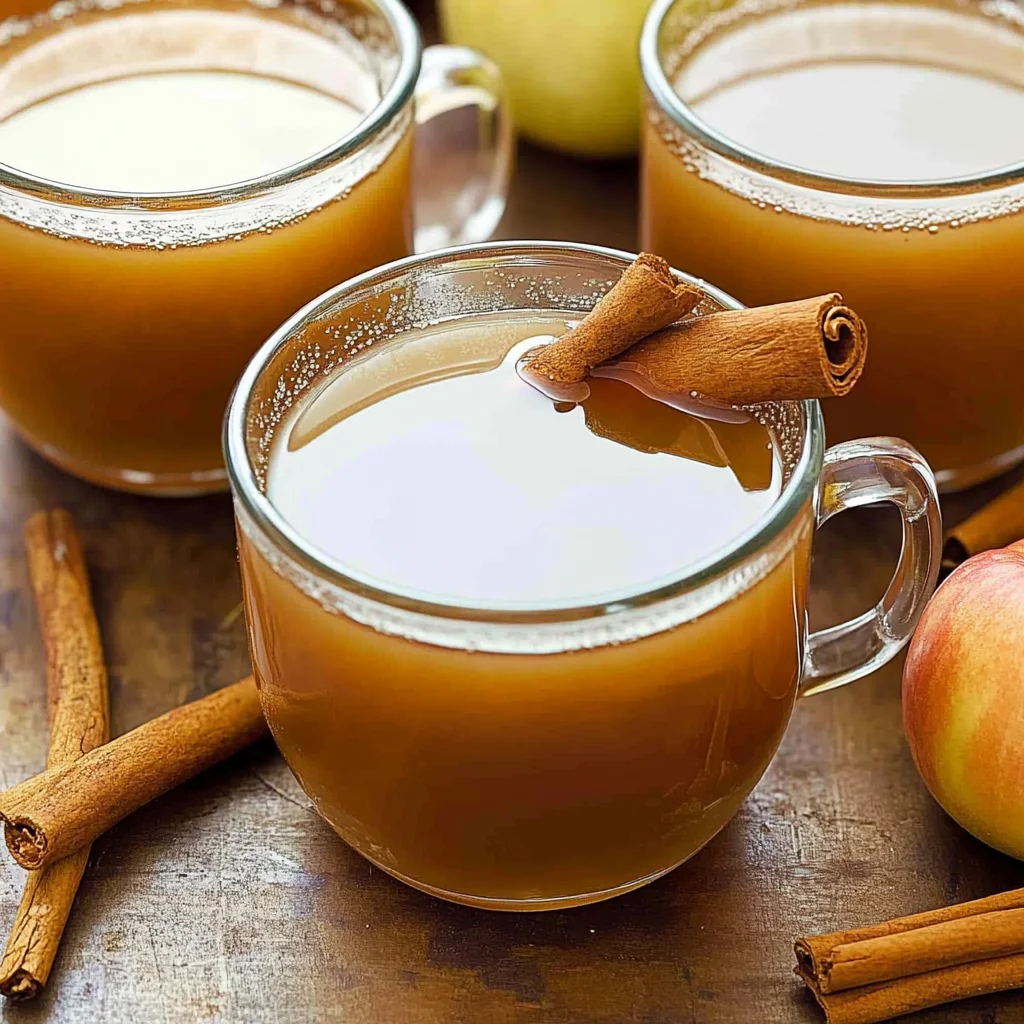
Final Adjustments:Taste your cider and adjust sweetness with additional brown sugar if desired. For more spice flavor, consider simmering for an extra 15-30 minutes before serving warm with a cinnamon stick or orange slice.
Now that you’ve crafted your homemade apple cider, let’s explore some delightful ways to serve it!
Common Mistakes to Avoid
- One common mistake when making homemade apple cider is not using a mix of sweet and tart apples, which can lead to an unbalanced flavor.
- Another frequent error is neglecting to stir the mixture occasionally while it simmers, as this helps the apples break down properly and release their juices.
- Lastly, some people skip adjusting the sweetness at the end, resulting in a cider that may taste too bland or overly sweet.
To ensure your homemade apple cider turns out perfectly, let’s explore the next steps for straining and final adjustments.
Pro Tips for Best Results
1. For a more complex flavor, choose a variety of apples; mixing sweet and tart will enhance your homemade apple cider significantly.
2. Allow the cider to simmer longer than 2 hours if you prefer a richer, more intense spice flavor.
3. Taste your cider before serving; adjusting the sweetness with brown sugar can create your perfect balance of flavors.
With these tips in mind, you’re ready to dive into the delightful process of making homemade apple cider!
Make It Your Way
- Feel free to experiment with your homemade apple cider by swapping in different apple varieties based on what you have available, or even adding a splash of cranberry juice for a tart twist.
- If you’re looking for a sugar-free option, consider using honey or maple syrup to sweeten the cider naturally.
- For a spicier kick, try incorporating ginger slices or a dash of nutmeg alongside the cinnamon and cloves.
- Let your creativity shine while keeping the essence of this cozy drink!
As you explore these flavorful variations, let’s dive into the step-by-step process of creating your own delightful homemade apple cider.
What to Serve With It
Homemade apple cider pairs wonderfully with hearty dishes like roasted pork or a warm, spiced apple pie. For a cozy evening, enjoy it alongside a slice of cheddar cheese or with freshly baked cinnamon rolls. A splash of bourbon can elevate your cider for an adult twist.
Now that you have the perfect serving suggestions, let’s explore some tips for making your homemade apple cider even more delightful!
Make-Ahead & Meal Prep
Homemade apple cider can be prepared ahead of time and stored in the refrigerator for up to a week. To enhance flavor, consider simmering the spices longer before serving. Avoid adding too much sugar initially, as sweetness can develop over time. Enjoy your delicious cider anytime! Now, let’s dive into serving suggestions.
Storing & Reheating
To store your homemade apple cider, keep it in an airtight container in the refrigerator for up to one week. When reheating, gently warm the cider on the stovetop over low heat to preserve its texture and flavor, stirring occasionally for even heating.
Now that you know how to store and reheat your cider, let’s explore some delightful serving suggestions!
Troubleshooting & Fixes
If your homemade apple cider turns out too tart, consider adding more brown sugar to balance the flavor. If it’s lacking spice, simmer the cider for an additional 15-30 minutes with extra cinnamon or cloves. Lastly, if the cider isn’t fragrant, ensure you stir occasionally during simmering to help release the apple juices fully.
Now that you’ve resolved any issues, let’s explore how to serve your delicious homemade apple cider!
FAQ
What types of apples are best for homemade apple cider?
A mix of sweet and tart varieties like Fuji, Granny Smith, and Honeycrisp works best for flavor.
Can I add other ingredients to my homemade apple cider?
It’s best to stick to the official ingredients for the most authentic flavor and balance.
How long does homemade apple cider last in the fridge?
Homemade apple cider can last up to one week when stored properly in the refrigerator.
Enjoying homemade apple cider is a delightful experience, and now you can explore serving suggestions!
Homemade Apple Cider
Ingredients
Method
- Wash the apples thoroughly under running water to remove any dirt or pesticides.
- Core and quarter the apples. There's no need to peel them, as the skins will add flavor and nutrients to the cider.
- In a large pot, combine the quartered apples, sliced orange, and water. The water helps to create steam and extract juice from the apples.
- Add the cinnamon sticks, whole cloves, allspice berries, and brown sugar to the pot. Stir gently to mix the ingredients.
- Cover the pot and bring the mixture to a boil over medium-high heat. Once boiling, reduce the heat to low and let it simmer for about 2 hours.
- Stir occasionally to ensure that the apples are breaking down and releasing their juices. The mixture should become fragrant and the apples should soften.
- After 2 hours, remove the pot from heat. Using a strainer or cheesecloth, strain the mixture into a large bowl or pitcher, pressing down on the solids to extract as much liquid as possible.
- Discard the solids (or compost them) and return the liquid cider to the pot.
- Taste the cider and adjust the sweetness by adding more brown sugar if desired. If you want a stronger spice flavor, you can simmer it for an additional 15-30 minutes with more spices.
- Serve warm, garnished with a cinnamon stick or a slice of orange if desired.